Creating any sort of “library” at home may seem a little bit daunting, but I promise, it’s doesn’t have to be! You also don’t need to go out and buy hundreds of dollars worth of books and have a full-blown library room in your house either! A few books, some organizational tools, and a small shelf/nook/cabinet are all you need.
I’m going to help you get started…

Now, being a huge book nerd myself, we’ve always had lots and lots of books at our house. Annnd, because of my teacher background, I have our books organized by genre and category. One of those categories has always been “I Can Read” books. In this bin I’ve always kept a few BOB books and an array of “learning to read”/beginner books. But it wasn’t until I took on this project that I realized my one bin of “I Can Read” books contained 12 (TWELVE!) different levels of texts! No wonder Ardyn was getting frustrated!
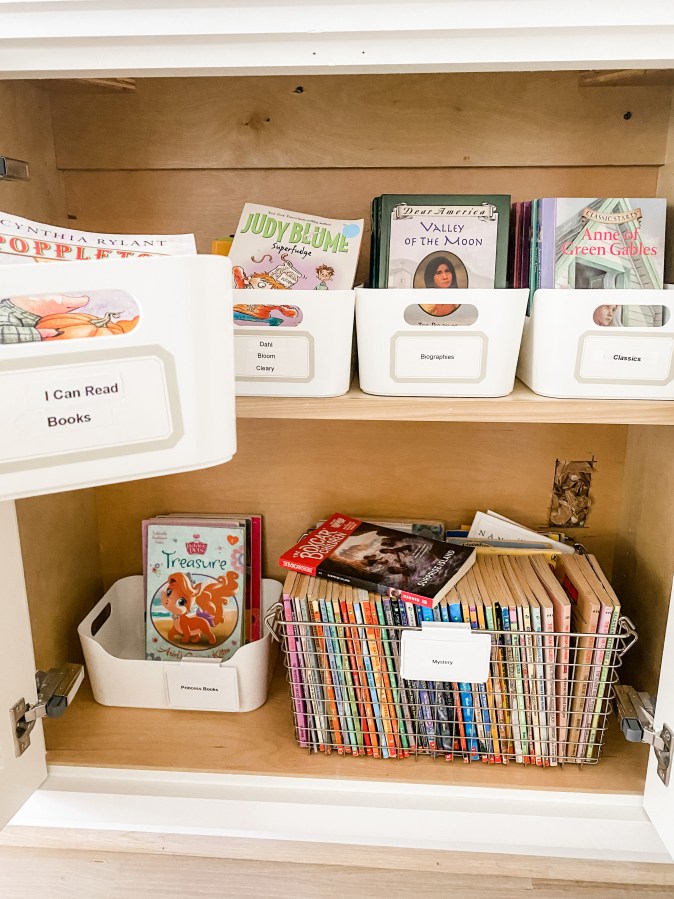
*Linking these white book bins HERE.* (My chapter books are in the size small and I keep picture books in the size medium)
Then, I was having a conference with Ardyn’s teacher this year and she mentioned the alphabetical “level” that Ardyn should be reading at and I decided to organize our books & create a mini leveled library for her in our home. I asked A’s teacher if there was an easy way to find books according to level these days and she filled me in on something that did NOT exist when I used to teach: book scanning/leveling apps!!! We used to have to use websites and databases and all kinds of old-fashioned things like that! 😉
A NOTE ON BOOK LEVELING:
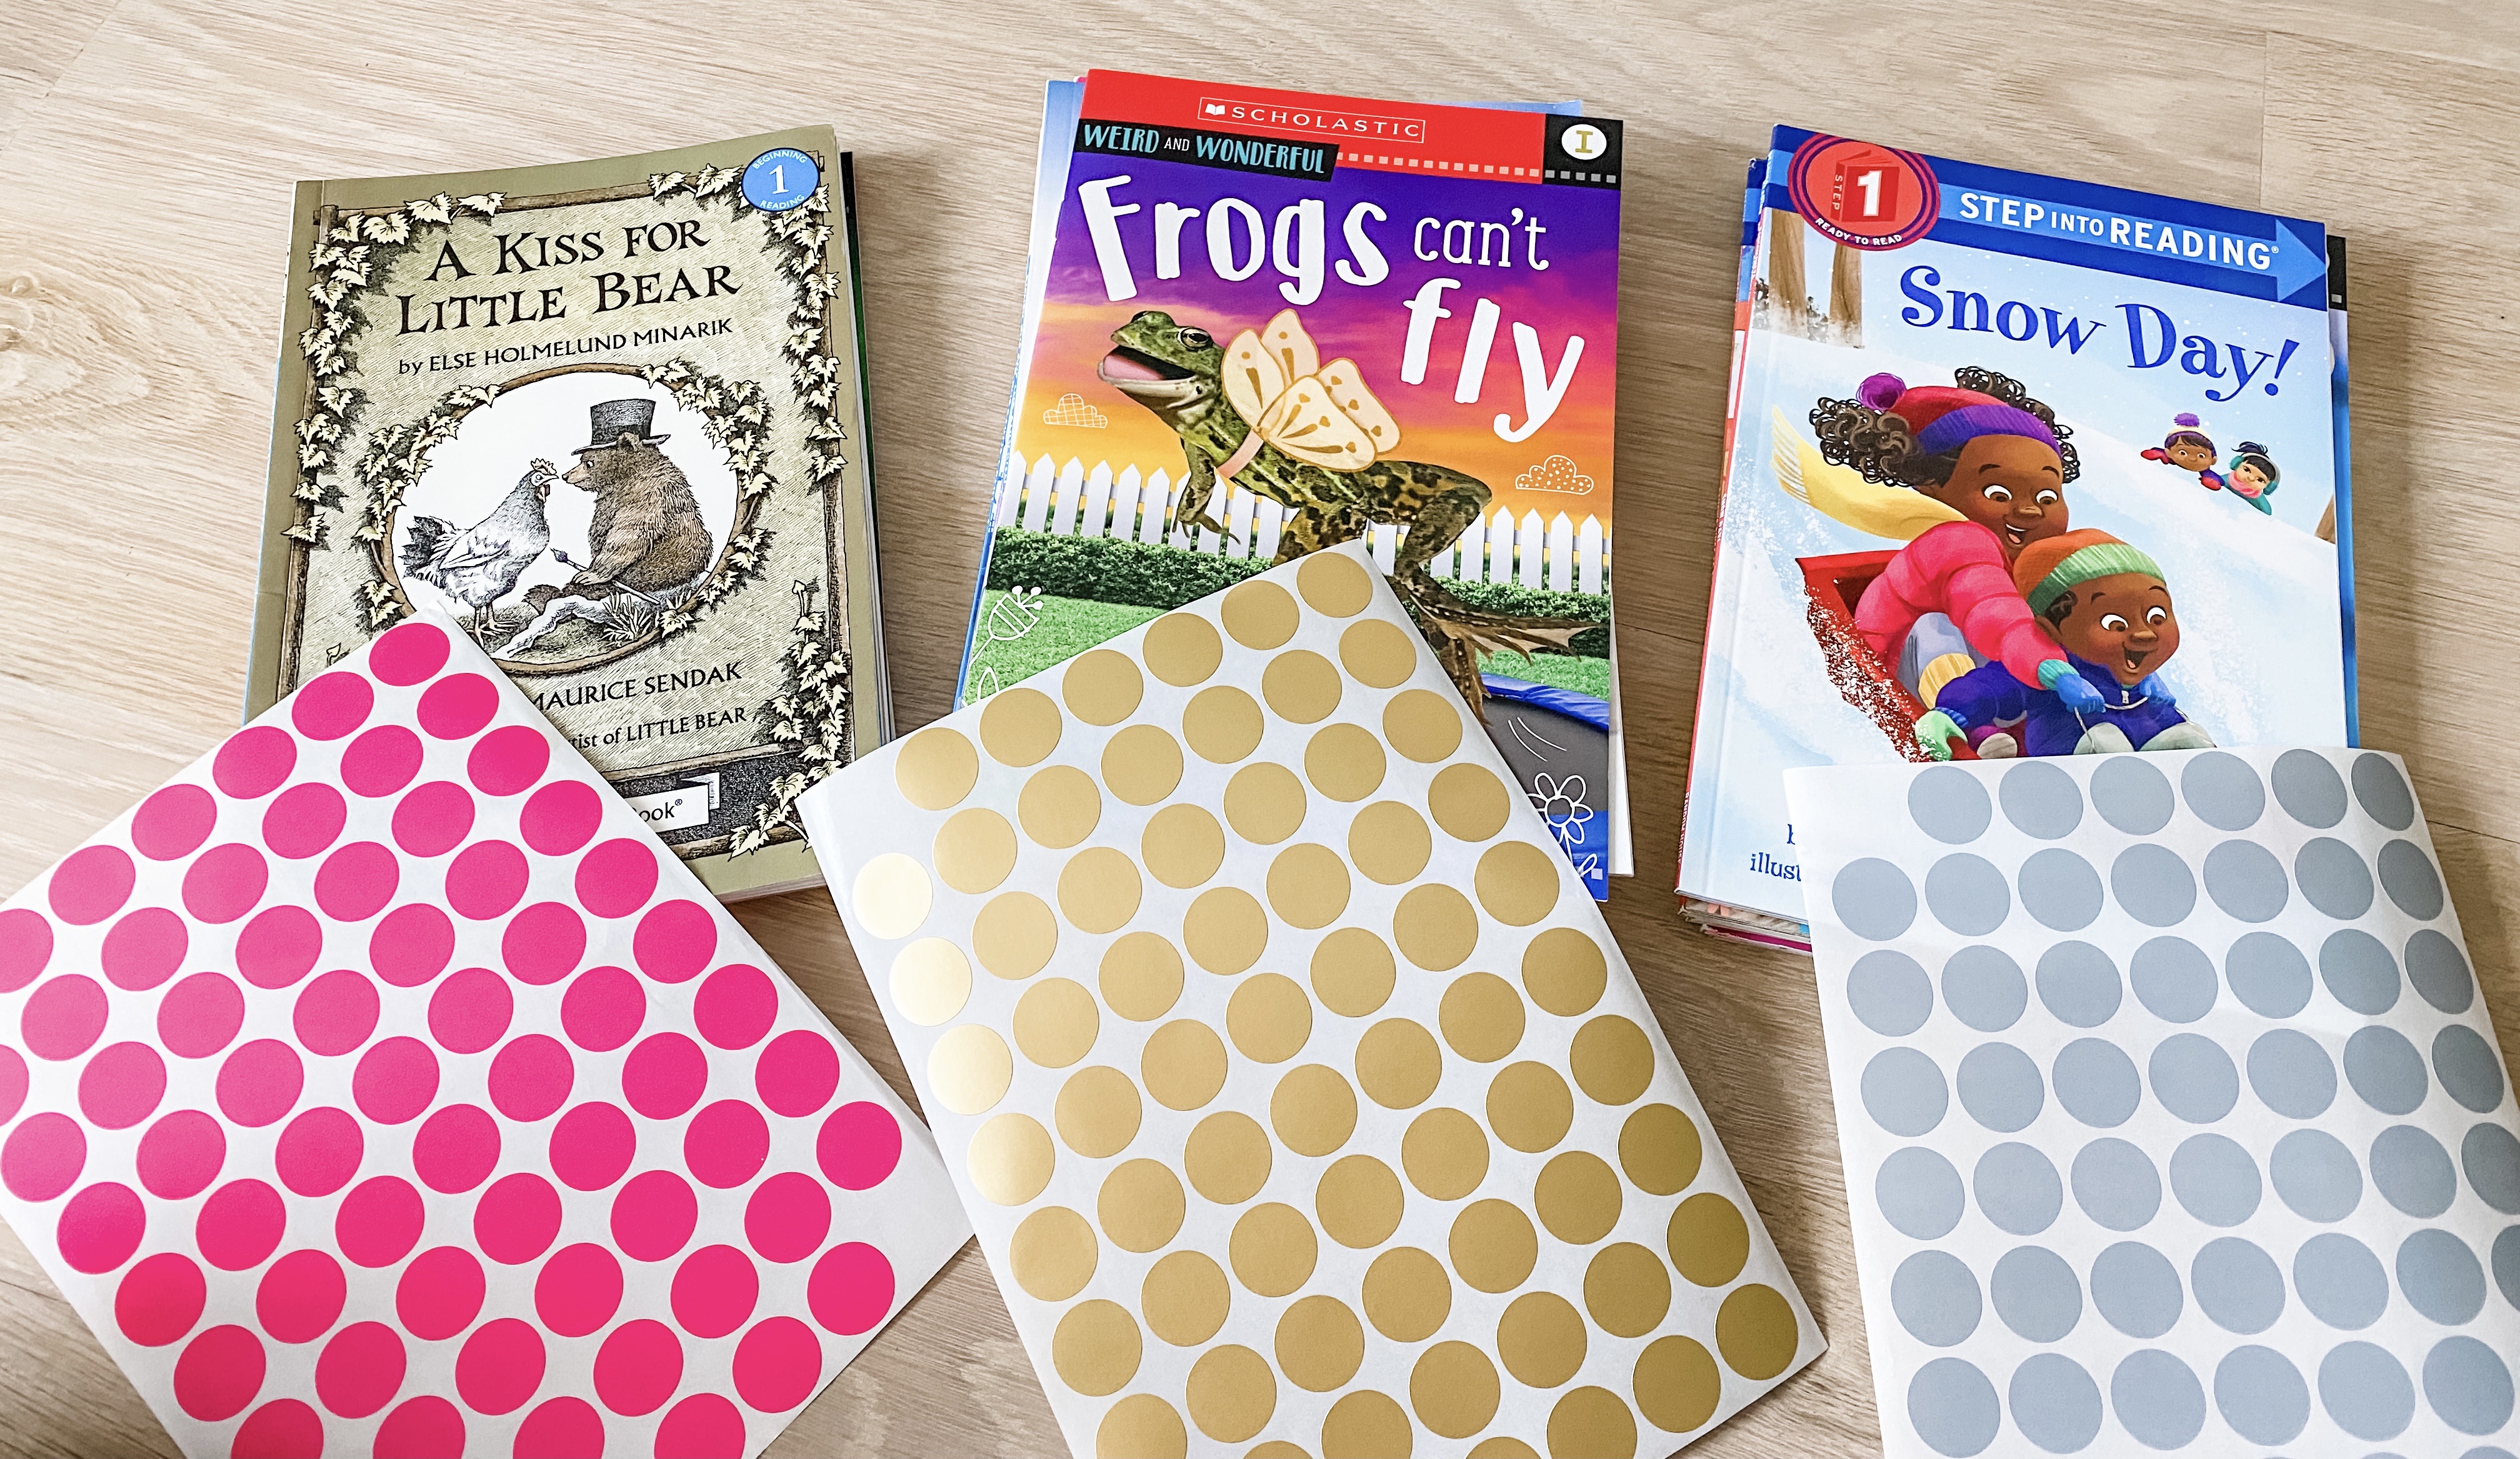
- Now let me detour here for a minute and say that I have not studied book leveling extensively in many years and there are over 8 (that I know of) different systems and rubrics out there used for leveling books. It can get pretty complex! (If you want to dive in, click here) If you want to keep it surface level, then keep reading. Today, in this blog post, I’ll talk about “an A-Z system”. You may have noticed that some of the beginning reader publishing companies like “I Can Read” and “Step into Reading” are starting to denote an alphabetical reading level right on their book covers. (See photo below) Nice, right?! This makes things super easy for parents and teachers to grab books at a glace– HOWEVER, it is important to remember that different publishing companies use different leveling systems. (So, technically not all “Level D” books are equivocally created equal) In the beginning stages, without doing extensive research, it might be smart to pick one publisher and follow along with their leveling system…until you start getting the hang of it yourself. For the purpose of this blog post and for Ardyn’s little Leveled Library, I didn’t do any complex converting and just leveled the books by face value (what they said on the book cover) or what my app scanned them as.
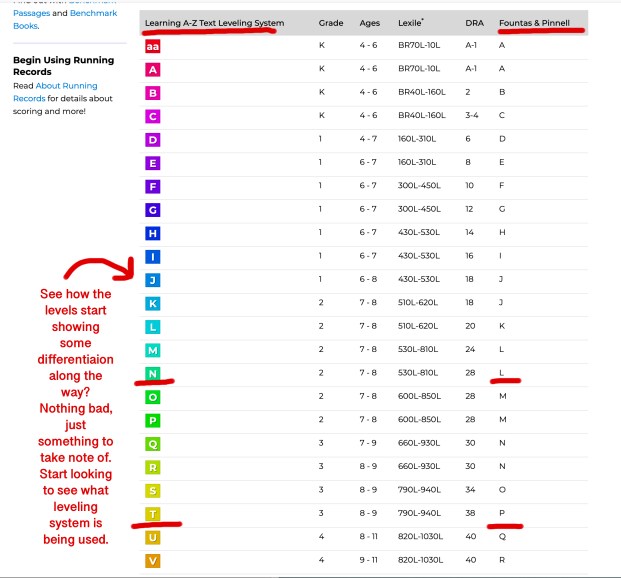
Above is a chart of a leveling system called Reading A-Z (far left) verses Fountas & Pinnell (far right). You can see that as you move down the alphabet, there is some differentiation in letter-to-level attachment. I just wanted to show you how the same book could easily be leveled two different letters by two different leveling methods. So, it’s just something to take notice of.

Getting Started
STEP 1:
Search your “app store” for a book-scanning-leveling app.
I used:
Scholastic Book Wizard App (Guided Reading Level)
Level It Books (gives you levels from 4 different leveling systems, which is great!)


I started by scanning and leveling the beginner books we already had at home. I found that most of them were way above the level Ardyn was currently reading at. Oopsie! After assessing what we already had at home, I did some shopping to fill in the gaps!
Now, sometimes the book I was trying to scan was “not found in the system” (super frustrating!) in which case, I tried my best to look at comparative books and guesstimate a level myself.
STEP 2:
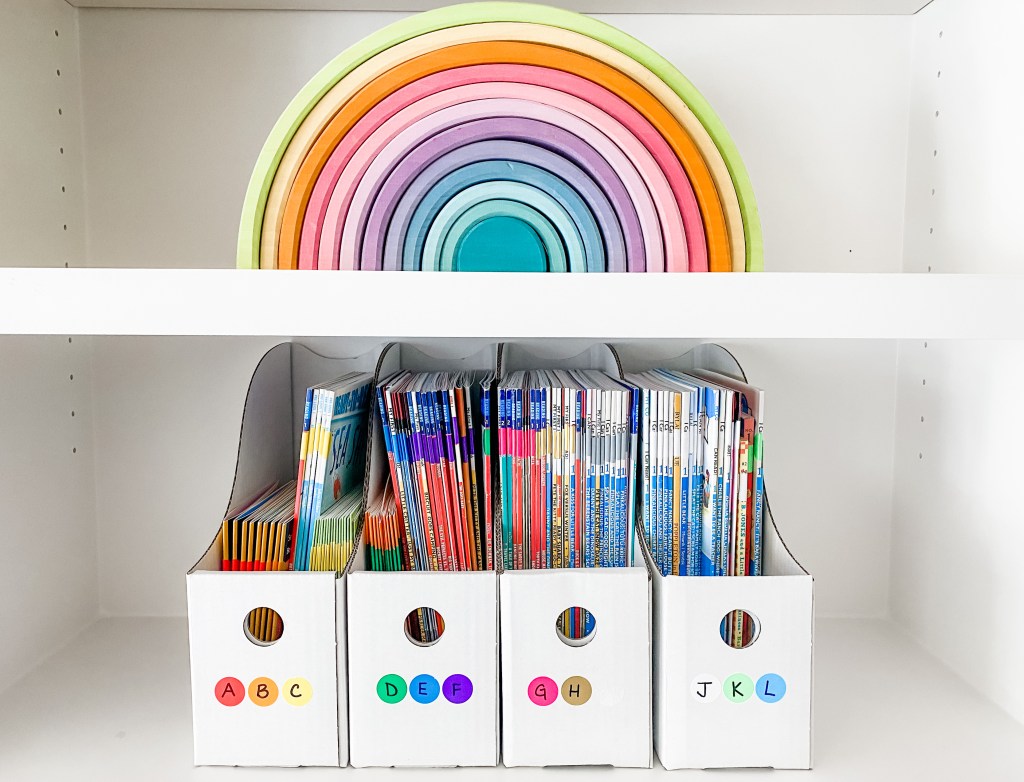
After putting all of our old and new books into leveled piles, I snagged some colored dot stickers from Amazon and assigned each color to a letter, A-L. (I’ll explain why I stopped at L later.)
STEP THREE:
I grabbed some cardboard magazine holders and started building our little leveled-library by putting 3 letters worth per box! Since I was only going A-L, four boxes was all I needed.

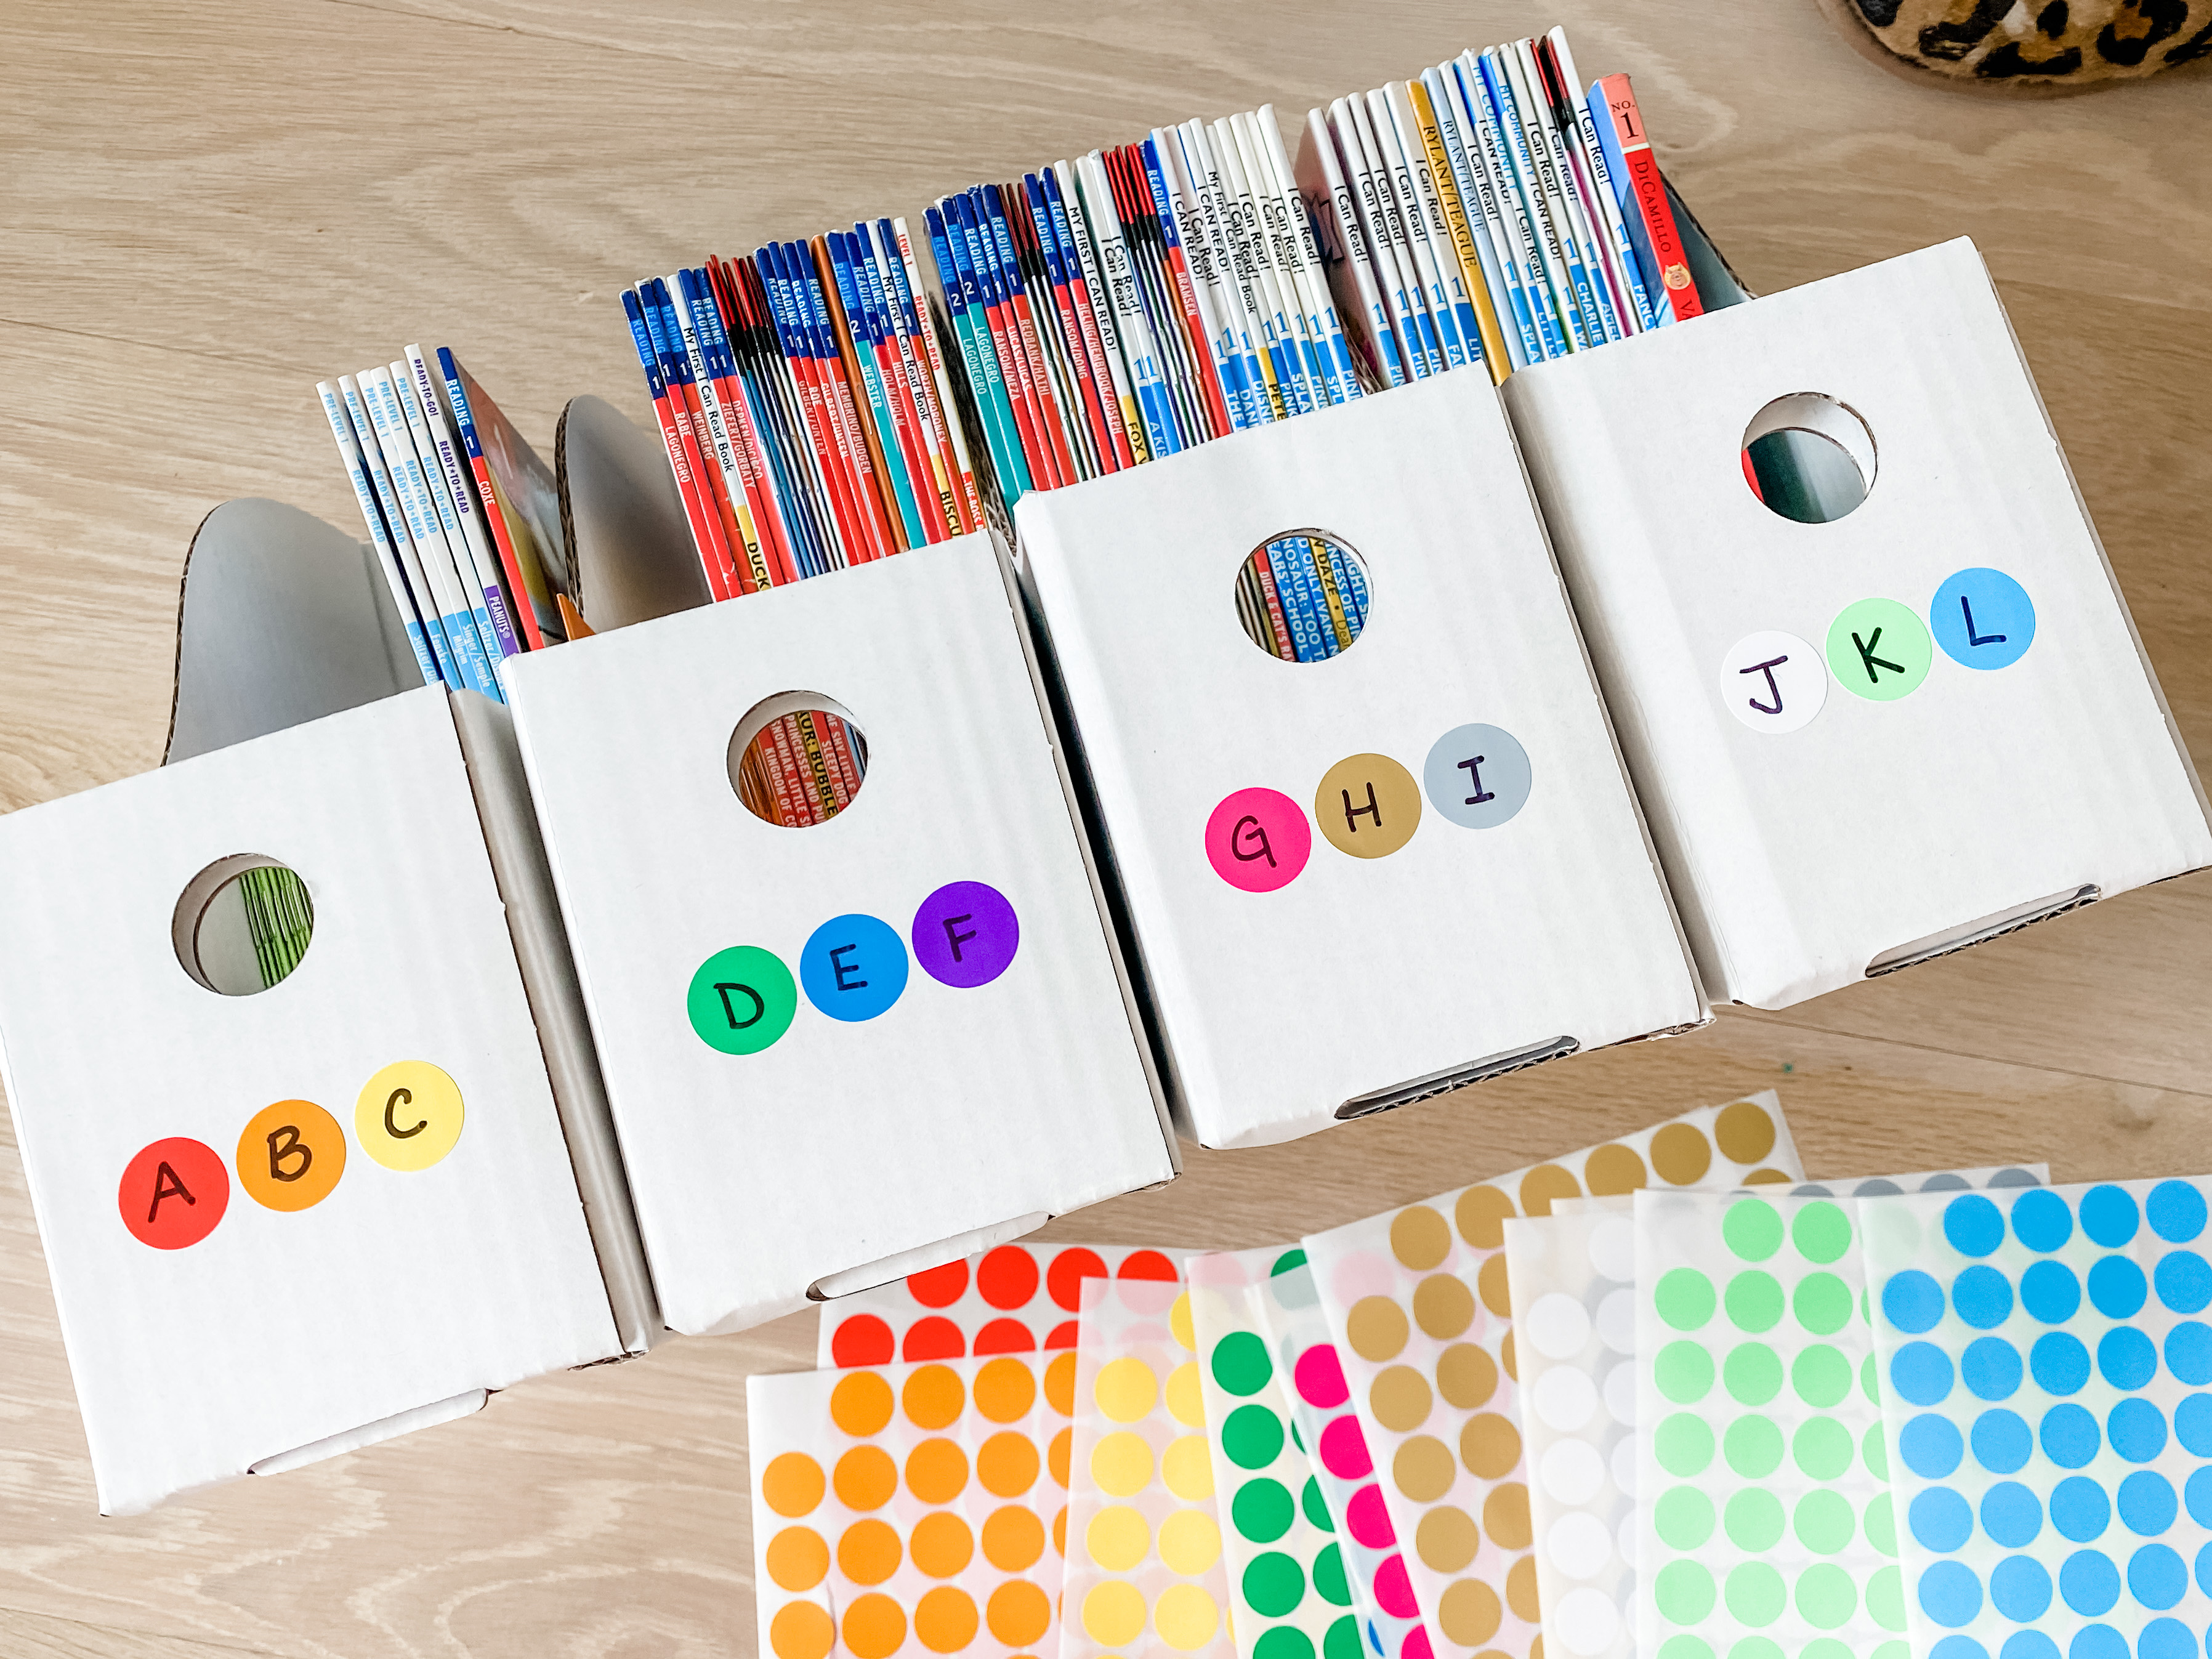
*Note, I only leveled A-L, because at level L+, you start moving into beginner chapter books like Mercy Watson, Magic Tree House, Junie B Jones, etc. So I did not do a comprehensive A-Z library (which I used to have in my 3rd grade classroom), but instead just a beginner’s version, figuring that once Ardyn moves on to chapter books, I can help guide her and teach her how to choose books for herself! Obviously, this is way easier to manage when you are only focused on your own child and not a classroom of 25!
STEP 4:
After I set up the “Library”, Ardyn and I went over it together. I told her which letter would be considered “easy”, which letter is currently “just right” for her and which letter would be her “challenge myself” category. Essentially giving her a span of 3 letters/colors to choose books from. (Not pictured: I used a little colored clip and clipped it onto the box lip, above her “just right” level/color, as an easy visual in case she forgets!)

(Also just noticing that Max ripped my letter “I” off…just pretend it’s there, right after “H” where it should be!)
STEP 5:
I took a little trip to Target and revamped the girls’ book baskets that they keep by their bed. I got them each a new book light, a small timer, a few cute bookmarks and put a cup with a mini pencil, and a chunk of post-it notes in each girls’ basket. I also added some sight word flash cards to Ardyn’s basket. (I don’t love the idea of “timing” your reading, but they are supposed to read for 15 minutes a night for school so Q insists on knowing when she’s hit her “quota.”)


The girls know to fill their baskets and change out books as often as needed. Q, for the most part, just works through a chapter book at a time, but for Ardyn, I like her to be able to cycle through them at will!
Note: In the great “Science of Reading” debate, I’d like to note that I’m a huge supporter of the importance of phonics in learning to read. This Leveled Library is simply a fun way for me to supplement what my kids are learning at school and become more confident in their reading! 🙂
I hope this was helpful! Feel free to reach out on Instagram if you have any questions!

HERE ARE SOME BOOKS/SETS THAT ARDYN HAS BEEN LOVING:
First Little Readers (I love that you can purchase a box BY level! Makes it so much easier!)
Guided Science Readers (again, purchase by level! And you know how I feel about mixing in nonfiction! Just keep in mind nonfiction books are usually more difficult that fiction & are sometimes not leveled accordingly, or so I’ve found. )
BOB Books (always and forever, love these for “learning to read”)
A Kiss for Little Bear (Level G)
Poppleton in Fall (Level J)
I Can Read Books (Look at back cover for Guided Reading Level)

IF YOU ARE LOOKING FOR MORE INFORMATION ON LEVELING, CHECK OUT THESE SITES:
Accelerated Reader An AMAZING Book Leveling resource!
Reading A-Z If you want to go all in and compare 8 different leveling systems, this chart is fantastic!
Scholastic Book Wizard Type in the book name and get the Scholastic A-Z level!
Learn About Leveled Reading A great jumping-off point for parents wanting to learn more!
AtoZ Teacher Stuff Another database for searching for book titles by level
Or just type “Guided Reading” into google! There are so many amazing charts and visuals to help you get started!


RELATED BLOG POSTS:
Creating Our Little Home Library Part One
Creating Our Little Home Library Part Two


 Notice how many baskets I’ve worked into the room? This allows Q to have (hidden) places to put all of her “stuff” (i.e. books, her prayer rock, mp3 player, giant yellow emoji pillow that doesn’t match the room, baby dolls, stuffed animals, pokemon cards, etc.) I think it’s important for kiddos to have places to store items they love- it also. makes clean-up/hiding things much easier & helps keep the room looking put together.
 I tried to take Quin & her interests into consideration as much as possible when picking out decorations. You can find traces of her love of mermaids, her shell collections, her love of dance, music, and reading, and her dream of one day going to Paris scattered around the room. Look closely…I tried to pick items that hold meaning to Q instead of just things I thought were “pretty”. Even something as simple as putting reading sconces over the beds have made her little book-loving heart SO happy!
 Who spotted the monitor camera hidden behind the golden elephant?! Yes, I still spy.
  Lots of people thought that door next to the bed was the door to the hallway, but it is actually Q’s bathroom & closet. I wouldn’t have put the beds on that wall if they were up against the main entrance like that.
 This record player has been one of my favorite purchases for her “big girl room”. Q listens to stories and music before bed and on “sleepover nights” Q & A put on records and dance and act them out (everything is a “show” with these two!) Plus, collecting old vintage records has been SO. MUCH. FUN! Think The Greatest Showman soundtrack will come out on vinyl?!! (Update: it HAS, and I already ordered it!!!) 😉
 I kept certain items from her “baby” room because she’s still only six- even if her room is a little more sophisticated now. Her little pink dollhouse and baskets of stuffed animals remind me that she’s still my baby. I know one day they’ll be replaced with “bigger girl” items. But not today! 😉
 This Petal Lane “being yourself” quote is actually a magnet board! I think it will be fun for Q to tack pictures to it as she gets older. And that DREAM sign stayed from her old room (it actually lights up and serves as a night light) and I just repainted the frame around it to pop against the newly white walls. (They used to be grey).


 This gorgeous fiber art rainbow was the
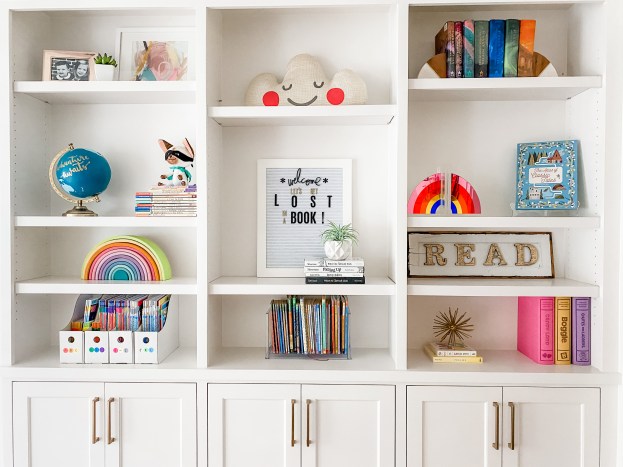
  Here’s a little TIP for decorating book shelves: If the highest shelf is out of reach for your kiddos try finding books with pretty covers and then ONLY putting the book covers on display on the highest shelf. Tell your kiddos what you’ve done so they don’t go reaching for them. Here’s why I do this: 1.Kids won’t get hurt trying reach for out-of-reach books (aka no heavy books will come crashing down on their heads) and 2. You can put the actual books in a bin somewhere at their level so they can still enjoy the books without them just being “decorations” up high on a shelf, collecting dust.